Author: Admin

  • How to Use Excel for Beginners

    How to Use Excel for Beginners


    Microsoft Excel is one of the most powerful tools for organizing data, performing calculations, and creating reports. While it may look complicated at first, beginners can quickly learn the basics to make work easier and more efficient. Here’s a simple guide to get started.


    1. Understand the Excel Interface

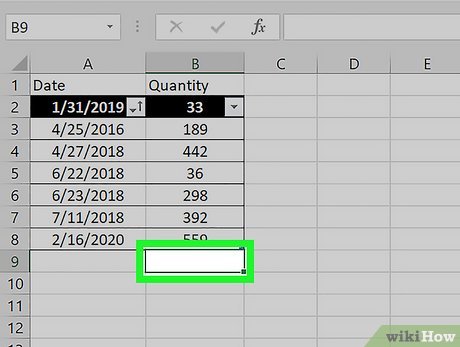
    •Excel is made up of rows (numbers) and columns (letters), which form cells.

    •Each cell can hold text, numbers, or formulas.

    •The Ribbon toolbar at the top has all the tools you need (Home, Insert, Formulas, Data, etc.).


    2. Learn Basic Cell Operations

    •Click a cell to type information.

    •Press Enter to move down or Tab to move right.

    •Copy (Ctrl + C) and paste (Ctrl + V) values across cells.

    •Autofill: drag the small box at the corner of a cell to repeat data.


    3. Format Your Data

    •Change font, size, and color to make data clearer.

    •Use bold, italic, or underline for emphasis.

    •Format numbers (currency, percentages, dates).

    •Adjust row height and column width for neatness.


    4. Use Simple Formulas

    •Start every formula with an equals sign (=).

    •Basic formulas:

    •=A1 + B1 (addition)

    •=A1 – B1 (subtraction)

    •=A1 * B1 (multiplication)

    •=A1 / B1 (division)

    •AutoSum: use =SUM(A1:A10) to add up a list of numbers.


    5. Learn Essential Functions

    •=AVERAGE(A1:A10) → calculates average.

    •=MAX(A1:A10) → finds the largest number.

    •=MIN(A1:A10) → finds the smallest number.

    •=COUNT(A1:A10) → counts numbers in a range.


    6. Create Simple Charts

    •Highlight your data.

    •Go to Insert → Charts (bar, pie, line, etc.).

    •Customize with titles, colors, and labels.


    7. Organize Data with Sorting & Filtering

    •Sort numbers (ascending/descending).

    •Filter to show only the data you want.

    •Useful for analyzing large tables quickly.


    8. Save and Share Your Workbook

    •Save as .xlsx (default Excel format).

    •Export as PDF for easy sharing.

    •Save to OneDrive/Google Drive for cloud access.

  • How to Detect and Remove Viruses from Your Computer

    How to Detect and Remove Viruses from Your Computer


    Computer viruses can slow down your system, steal your information, and even damage files. The good news is, you can detect and remove most viruses with the right tools and precautions. Here’s a step-by-step guide to help you keep your computer safe.


    1. Recognize the Signs of a Virus

    Look out for these common symptoms:

    •Your computer is slower than usual

    •Pop-up ads appear frequently

    •Programs crash or freeze

    •Unknown apps or files show up

    •Your internet or browser acts strangely (redirects, new toolbars)


    2. Disconnect from the Internet

    •Unplug Wi-Fi or Ethernet to prevent the virus from spreading or sending data.

    •This helps contain the infection while you clean your system.


    3. Boot into Safe Mode

    •Restart your computer and enter Safe Mode (Windows: press F8 or Shift+Restart; Mac: hold Shift while booting).

    •In Safe Mode, only essential programs run making it easier to remove malware.


    4. Run Antivirus or Anti-Malware Software

    •Install and run trusted tools like Windows Defender, Avast, Kaspersky, Malwarebytes, or Bitdefender.

    •Do a full system scan (not just a quick scan).

    •Quarantine or delete infected files.


    5. Remove Temporary Files

    •Use the built-in Disk Cleanup tool (Windows) or CleanMyMac (Mac).

    •This clears unnecessary files and may delete hidden malware.


    6. Check Installed Programs

    •Go to your installed apps list.

    •Uninstall suspicious or unknown programs.

    •Be careful not to delete essential system software.


    7. Reset Your Web Browser

    •Viruses often affect browsers with unwanted extensions or redirects.

    •Remove unknown extensions.

    •Reset browser settings to default.


    8. Update Your System and Software

    •Install the latest Windows/Mac updates.

    •Keep your antivirus definitions updated.

    •Outdated software often has security holes.


    9. Restore or Reset if Needed

    •If the virus persists, use System Restore (Windows) to roll back to a clean state.

    •On Mac, use Time Machine if you have backups.

    •As a last resort, do a factory reset or reinstall the operating system.


    10. Prevent Future Infections

    •Always keep antivirus software active.

    •Don’t download files from unknown sources.

    •Avoid clicking suspicious links or email attachments.

    •Enable firewall protection.

  • How to Create a Facebook Page for Your Business

    How to Create a Facebook Page for Your Business


    In today’s digital world, every business needs an online presence, and Facebook is one of the best places to start. With billions of active users, a Facebook Page helps you reach potential customers, promote your products, and build a brand community all for free.


    Here’s a step-by-step guide to creating a professional Facebook Page for your business:

    Step 1: Log in to Facebook

    You’ll need a personal Facebook account to create and manage a business page. Don’t worry—your personal details won’t appear on the page.


    Step 2: Create a New Page

    1.On Facebook, click Menu → Pages → Create New Page.

    2.Enter your business name (this will be your page title).

    3.Choose a category (e.g., Clothing Brand, Restaurant, Consultant).

    4.Write a short description about what your business offers.


    Step 3: Add a Profile and Cover Photo

    •Profile picture: Use your business logo for recognition.

    •Cover photo: Add a banner that reflects your brand (such as products, store image, or slogan).

    •Make sure the images are clear and high-quality.


    Step 4: Fill in Business Information

    •Add your contact details (phone number, email, website).

    •Include your location and business hours if relevant.

    •The more complete your details, the more trustworthy your page looks.


    Step 5: Customize Your Page

    •Create a username/handle (e.g., @YourBusinessName) so people can find you easily.

    •Add a call-to-action button like Shop Now, Book Now, or Contact Us.

    •Adjust your tabs (Shop, Services, Reviews) depending on your business.


    Step 6: Publish Your First Post

    Welcome your audience with a simple introduction:

    Who you are

    What your business does

    Why people should follow your page

    Pin this post so it stays at the top for new visitors.


    Step 7: Invite and Grow Your Audience

    •Invite friends and customers to like your page.

    •Share your page link on WhatsApp, Instagram, and email.

    •Ask happy customers to leave reviews.


    Step 8: Stay Active

    •Post regularly (2–3 times per week).

    •Share updates, offers, photos, videos, and even live sessions.

    •Reply quickly to messages and comments to build trust.


    Step 9: Use Facebook Tools

    •Insights: Track who engages with your posts.

    •Facebook Ads: Boost posts or run campaigns to reach more people.

    •Messenger: Use automated replies to respond to customers.

  • How to Save and Organize Files in OneDrive

    How to Save and Organize Files in OneDrive


    Microsoft OneDrive is a cloud storage service that lets you save, access, and share your files from anywhere. Whether you’re using a computer, tablet, or phone, OneDrive makes file management simple and secure. Here’s how to save and organize your files effectively.


    1. Set Up OneDrive

    •On Windows: OneDrive usually comes pre-installed. Sign in with your Microsoft account.

    •On Mac/Phone: Download the OneDrive app from the App Store or Google Play.

    •Log in with your Microsoft account to start syncing.


    2. Save Files to OneDrive

    •From Computer:

    •Drag and drop files into the OneDrive folder.

    •Or click Save As → OneDrive when working in apps like Word or Excel.

    •From Phone:

    •Use the OneDrive app.

    •Tap + → Upload to add photos, videos, or documents.


    3. Create Folders for Better Organization

    •Right-click in OneDrive and select New → Folder.

    •Name folders clearly (e.g., Work, School, Photos, Receipts).

    •Use subfolders for categories (e.g., Photos → Vacations → 2024).


    4. Rename and Tag Files

    •Give files clear names like Invoice_January2025.pdf instead of Doc1.pdf.

    •Use dates or keywords for easy searching later.


    5. Use Search to Find Files Quickly

    •At the top of OneDrive, use the Search bar.

    •Type a keyword, file type, or date.

    •OneDrive scans file names, tags, and even text inside documents.


    6. Sync Across Devices

    •Any file saved in OneDrive automatically appears on all devices connected to your account.

    •Changes update in real time, so you always have the latest version.


    7. Share Files and Folders

    •Right-click a file → Share.

    •Choose whether others can view only or edit.

    •Share via email, link, or Teams.


    8. Use Version History

    •Right-click a file → Version History.

    •Restore older versions if you make mistakes or delete content by accident.


    9. Keep Files Secure

    •Use Personal Vault for sensitive documents (extra PIN/security required).

    •Enable two-step verification for extra protection.

  • How to Set Up an Online Store

    How to Set Up an Online Store


    Selling products online is one of the fastest ways to grow a business today. An online store allows you to reach customers worldwide, sell 24/7, and build a strong digital presence. If you’re new to e-commerce, don’t worry setting up an online store is easier than you think.


    Here’s a step-by-step guide to help you get started:

    1. Choose What to Sell

    •Decide on your product(s): physical goods, digital downloads, or services.

    •Research your target audience and competitors.

    •Pick a niche to stand out in the market.


    2. Pick an E-Commerce Platform

    Choose a platform that matches your budget and needs:

    •Shopify – easy to set up, beginner-friendly.

    •WooCommerce (WordPress plugin) – great if you already have a website.

    •Wix / Squarespace – simple drag-and-drop website builders.

    •BigCommerce / Magento – for larger, more complex stores.


    3. Get a Domain Name & Hosting

    •A domain name is your store’s web address (e.g., www.myshop.com).

    •Most platforms let you buy a domain directly or connect an existing one.

    •Hosting is included in platforms like Shopify and Wix, but if you use WooCommerce, you’ll need separate hosting.


    4. Design Your Online Store

    •Pick a theme or template that suits your brand.

    •Customize with your logo, colors, and fonts.

    •Organize navigation menus for easy browsing.

    •Add professional product photos and descriptions.


    5. Add Products

    •Include clear product names.

    •Write detailed descriptions (benefits, features, uses).

    •Upload high-quality images from multiple angles.

    •Set prices, inventory, and shipping details.


    6. Set Up Payment Methods

    Make it easy for customers to pay by adding:

    •Credit/Debit card payments

    •PayPal

    •Mobile payments (Apple Pay, Google Pay)

    •Local options (depending on your country)


    7. Arrange Shipping & Delivery

    •Decide if you’ll ship locally, internationally, or both.

    •Choose delivery methods (courier, postal service).

    •Set clear shipping fees or offer free shipping to attract buyers.


    8. Test Your Store Before Launch

    •Place a test order to check the payment system.

    •Make sure checkout, emails, and receipts work smoothly.

    •Fix any issues before going live.


    9. Launch and Promote Your Store

    •Share your store link on Facebook, Instagram, and WhatsApp.

    •Run ads to reach more customers.

    •Use email marketing to update customers about new products and offers.


    10. Maintain and Grow

    •Update products regularly.

    •Respond to customer questions quickly.

    •Monitor sales reports and customer feedback.

    •Add new features like discounts, gift cards, or loyalty programs.

  • How to Take Better Photos with Your Phone

    How to Take Better Photos with Your Phone


    You don’t need a professional camera to capture stunning photos your smartphone is more powerful than you think. With just a few simple tips, you can take sharper, brighter, and more creative photos right from your phone.


    Here’s how to improve your photography skills:

    1. Clean Your Camera Lens

    A dirty lens makes photos look blurry or dull. Use a soft cloth to wipe the lens before taking pictures.


    2. Use Natural Light Whenever Possible

    •Take photos near windows or outdoors.

    •Early morning and late afternoon (golden hours) give the best lighting.

    •Avoid harsh flash natural light looks more flattering.


    3. Focus on Your Subject

    •Tap the screen to focus on the main subject.

    •Hold still until the image sharpens.

    •Use portrait mode (if available) for clear subject shots.


    4. Keep Your Camera Steady

    •Hold your phone with both hands.

    •Lean against something for balance.

    •Use a tripod or timer for extra stability.


    5. Learn the Rule of Thirds

    •Turn on the gridlines in your camera settings.

    •Place your subject along the lines or intersections instead of the center.

    •This makes your photos look more professional and balanced.


    6. Explore Camera Modes

    •Portrait Mode: Great for people and close-ups.

    •Night Mode: For low-light shots.

    •Panorama: Wide, scenic shots.

    •Pro/Manual Mode: Adjust settings like ISO, shutter speed, and white balance.


    7. Pay Attention to Backgrounds

    •Avoid clutter or distracting objects behind your subject.

    •Use simple backgrounds to make your subject pop.


    8. Experiment with Angles

    •Don’t always shoot from eye level.

    •Try low angles, high angles, or side perspectives.

    •Move around to find the most flattering shot.


    9. Edit Your Photos

    •Use editing apps like Snapseed, VSCO, or Lightroom Mobile.

    •Adjust brightness, contrast, and saturation.

    •Don’t over-edit keep it natural.


    10. Practice, Practice, Practice

    The more you take photos, the better you’ll get. Try different lighting, subjects, and styles to develop your own photography eye.

  • How to Edit Videos on Your Phone

    How to Edit Videos on Your Phone


    Video editing doesn’t have to be complicated you don’t need a computer or expensive software. With just your smartphone, you can create professional looking videos for social media, YouTube, or personal projects. Here’s a step-by-step guide to editing videos on your phone.


    1. Choose the Right App

    There are many free and paid apps that make editing easy. Some popular options include:

    •CapCut (free, beginner-friendly)

    •InShot (great for social media videos)

    •KineMaster (advanced tools for detailed editing)

    •iMovie (for iPhone users)

    •Adobe Premiere Rush (cross-platform, professional feel)


    2. Import Your Video Clips

    •Open your editing app and tap New Project.

    •Select the videos or photos you want to use.

    •Arrange them in the order you want them to appear.


    3. Trim and Cut Clips

    •Cut out unwanted parts at the beginning or end.

    •Split long clips into shorter sections.

    •Keep your video concise to maintain viewer attention.


    4. Add Transitions

    •Smoothly move from one clip to another with transitions (fade, slide, dissolve).

    •Use simple transitions to keep it professional don’t overdo it.


    5. Insert Text and Titles

    •Add text for introductions, captions, or credits.

    •Use clear fonts and colors that stand out.

    •Keep text short and easy to read.


    6. Enhance with Music and Sound

    •Add background music that fits the mood.

    •Lower the music volume when someone is speaking.

    •Use sound effects to make your video more engaging.


    7. Adjust Brightness and Colors

    •Most apps let you change brightness, contrast, and saturation.

    •Apply filters for a specific style.

    •Don’t over-edit aim for natural, clear visuals.


    8. Add Stickers or Effects (Optional)

    •Fun for social media videos.

    •Use animations, emojis, or effects to match your theme.

    •Keep it minimal to avoid distractions.


    9. Export Your Video

    •When finished, tap Export/Save.

    •Choose the right resolution:

    •1080p (HD): Best for YouTube or Facebook.

    •720p: Works well for Instagram or TikTok.

    •Save to your phone or upload directly to social media.


    10. Practice and Improve

    The more you edit, the better you’ll get. Try experimenting with different styles until you find your unique editing flow.

  • How to Convert Files to Different Formats (PDF, Word, JPG, etc.)

    How to Convert Files to Different Formats (PDF, Word, JPG, etc.)


    Sometimes you need to change a file into another format for example, converting a Word document into a PDF, or a picture into JPG. Luckily, it’s simple to do using built-in tools, apps, or online converters. Here’s a quick guide.


    1. Why Convert Files?

    •To make documents easier to share (PDF is universal).

    •To reduce file size (JPG images are smaller than PNG).

    •To edit files in different programs (Word, Excel, PowerPoint).

    •To upload in required formats (job applications, online forms).


    2. Convert Documents to PDF

    •On Microsoft Word/Excel/PowerPoint:

    •Open your file → File → Save As → Choose PDF.

    •On Google Docs:

    •File → Download → PDF Document.

    •Mobile: Many office apps (WPS Office, Microsoft Office, Google Drive) let you export as PDF.


    3. Convert PDF Back to Word or Excel

    •Adobe Acrobat: Open PDF → Export → Choose Word or Excel.

    •Google Docs: Upload PDF → Right-click → Open with Google Docs → Download as Word.

    •Online tools: SmallPDF, iLovePDF, PDF2Doc.


    4. Convert Images (JPG, PNG, etc.)

    •Windows/Mac: Right-click image → Open with Paint/Preview → Save As → Choose format (JPG, PNG).

    •Phone Apps: Snapseed, PicsArt, or built-in gallery editors often allow “Export As”.

    •Online: Use free sites like Convertio or Online-Convert.


    5. Convert Videos and Audio Files

    •VLC Media Player: Media → Convert/Save → Choose output format (MP4, MP3, etc.).

    •Apps: InShot, CapCut (for mobile).

    •Online tools: CloudConvert, Zamzar.


    6. Use Online Converters (All-in-One)

    Websites like:

    •SmallPDF – for PDF conversions.

    •Convertio – supports documents, images, audio, and video.

    •Zamzar – over 1,000 file formats.

    (Tip: Be careful uploading sensitive files to online tools—use offline apps for privacy.)


    7. Tips for Successful Conversions

    •Always check the new file after converting (some formatting may change).

    •Use the right format for your purpose:

    •PDF: Sharing and printing.

    •Word/Excel: Editing.

    •JPG: Photos, smaller size.

    •PNG: Transparent images, better quality.

    •Keep backups of original files.

  • How to Download and Install Apps Safely

    How to Download and Install Apps Safely


    Apps make our phones and computers more useful but downloading from the wrong place can put your device at risk. Unsafe apps may contain viruses, steal your personal data, or slow down your device. To stay safe, follow these simple steps when downloading and installing apps.


    1. Use Official App Stores

    •For Android: Google Play Store

    •For iPhone/iPad: Apple App Store

    •For Windows: Microsoft Store

    •For Mac: Mac App Store


    Avoid downloading apps from random websites unless it’s the developer’s official site.

    2. Check the App Developer

    •Look at the developer name under the app title.

    •Stick to well-known or verified developers.

    •Beware of fake apps with similar names to popular ones.


    3. Read Reviews and Ratings

    •Apps with many downloads and high ratings are usually safer.

    •Check reviews for warnings about scams, bugs, or unusual behavior.


    4. Look at Permissions Before Installing

    •If a flashlight app asks for camera, contacts, or location access—it’s suspicious.

    •Only give permissions that make sense for the app’s purpose.


    5. Keep Your Device Updated

    •Regular updates fix security issues.

    •Enable automatic updates for apps and your operating system.


    6. Use Antivirus or Security Apps

    •On Android or Windows, install antivirus for extra protection.

    •Apps like Avast, Bitdefender, or Malwarebytes can block unsafe apps.


    7. Be Careful with APKs and Third-Party Apps

    •APK files (Android app files) from unknown sites may contain malware.

    •Only download APKs from trusted sources (like the official website of the app).


    8. Avoid Pirated Apps

    •“Free” cracked apps may contain viruses or spyware.

    •Stick to free alternatives or official free trials.


    9. Check Storage and Data Usage

    •If an app uses too much battery, storage, or data unexpectedly, uninstall it.

    •This could be a sign of hidden activity.


    10. Delete Apps You Don’t Use

    •Unused apps may still run in the background or pose security risks.

    •Regularly clean up your device.

  • How to Fix Common Computer Problems

    How to Fix Common Computer Problems


    Computers are powerful tools, but sometimes they don’t work the way we expect. From slow performance to unexpected errors, small issues can be frustrating but the good news is that most problems are easy to fix yourself.


    Here’s a guide to solving some of the most common computer problems:

    1. Computer Is Running Slow

    Causes: Too many programs running, low storage, or outdated software.


    Fixes:

    •Close unused apps and browser tabs.

    •Restart your computer.

    •Delete unnecessary files or programs.

    •Run a virus scan.

    •Upgrade RAM or storage if the problem continues.


    2. Internet Connection Issues

    Causes: Router problems, Wi-Fi signal, or network settings.

    Fixes:

    •Restart your router and computer.

    •Check if Wi-Fi is turned on.

    •Move closer to the router.

    •Run the Windows or Mac network troubleshooter.

    •Call your internet provider if nothing works.


    3. Computer Freezes or Crashes

    Causes: Overheating, low memory, or software bugs.

    Fixes:

    •Press Ctrl + Alt + Delete (Windows) or Command + Option + Escape (Mac) to close frozen programs.

    •Restart the computer.

    •Update your operating system and drivers.

    •Check for overheating (clean dust and ensure good airflow).


    4. No Sound on the Computer

    Causes: Muted sound, faulty drivers, or hardware issues.

    Fixes:

    •Check if the sound is muted or the volume is low.

    •Make sure the correct output device (speakers/headphones) is selected.

    •Update or reinstall audio drivers.

    •Test with another speaker or headphone.


    5. The Screen Is Blank

    Causes: Power issues, loose cables, or faulty display.

    Fixes:

    •Check if the computer is on.

    •Make sure cables are properly connected.

    •Test with another monitor.

    •Restart the computer.


    6. Printer Is Not Working

    Causes: Connection errors, paper jams, or outdated drivers.

    Fixes:

    •Check if the printer is on and connected.

    •Clear paper jams.

    •Reinstall or update printer drivers.

    •Restart both the computer and printer.


    7. Strange Noises or Overheating

    Causes: Dust, fan issues, or hardware problems.

    Fixes:

    •Clean dust from fans and vents.

    •Make sure the computer is placed on a hard surface, not soft fabric.

    •If noises continue, get the hardware checked.


    8. Software Won’t Install or Open

    Causes: Incompatibility, missing updates, or corrupted files.

    Fixes:

    •Check if the software is compatible with your system.

    •Update your operating system.

    •Download the software again from the official site.

    •Run as administrator (Windows).


    9. Computer Won’t Start

    Causes: Power issues or system errors.

    Fixes:

    •Check if the power cable or battery is connected.

    •Try another power outlet.

    •Remove external devices (USB, hard drives) and restart.

    •Boot into Safe Mode to troubleshoot.


    10. Virus or Malware Infection

    Causes: Unsafe downloads, suspicious emails, or browsing untrusted sites.

    Fixes:

    •Disconnect from the internet.

    •Run a full antivirus or anti-malware scan.

    •Delete or quarantine infected files.

    •Reset your browser settings.

    •Keep your antivirus updated.