Step-by-Step Guide to Using Two-Factor Authentication (2FA)
In today’s world, passwords alone aren’t enough to keep your accounts safe. Hackers can guess, steal, or crack them — but Two-Factor Authentication (2FA) adds an extra layer of protection. Even if someone gets your password, they can’t access your account without the second verification step.
Here’s a simple step-by-step guide to set up and use 2FA.
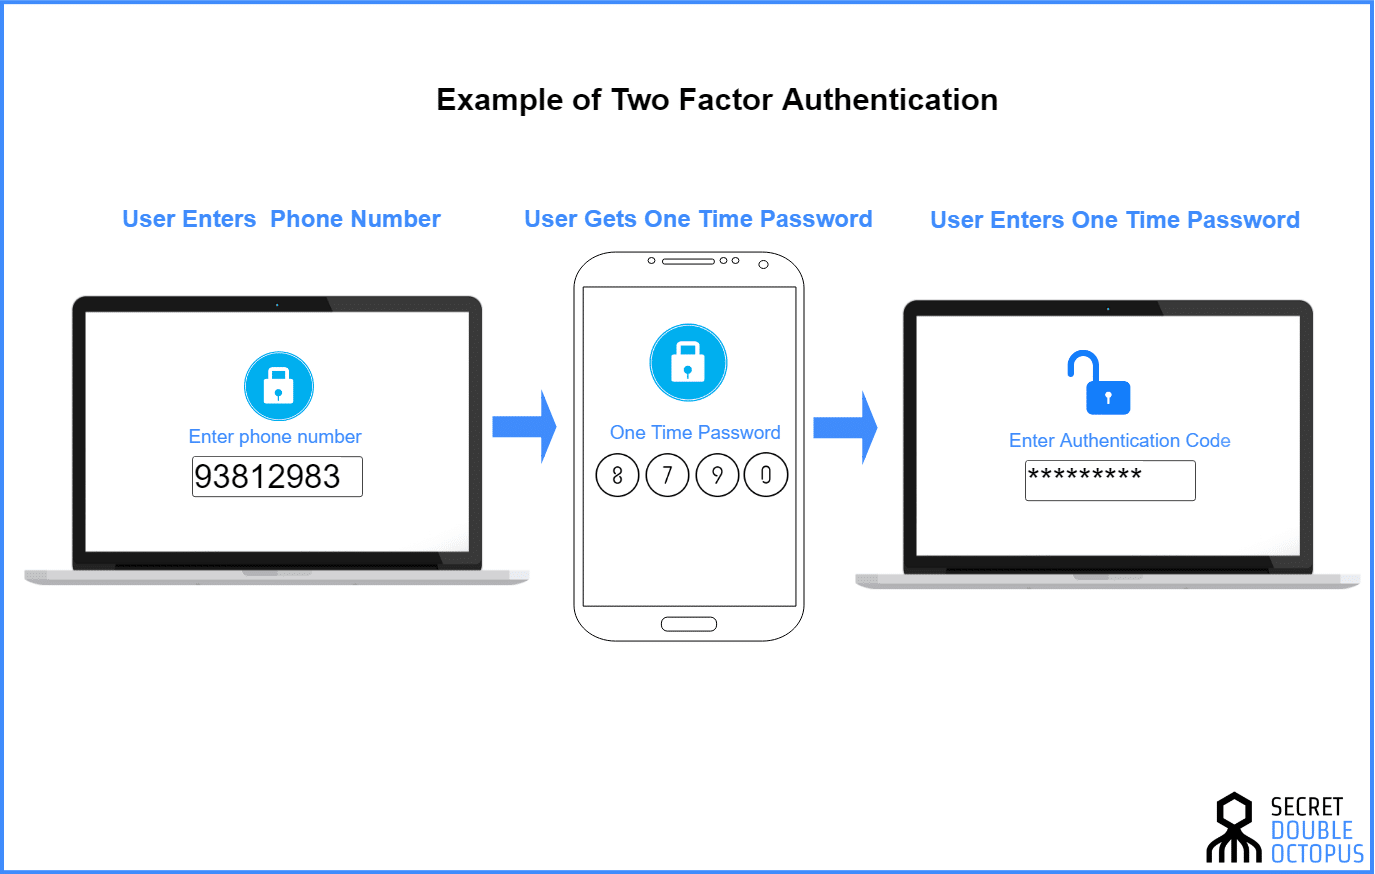
1. Understand How 2FA Works
Two-Factor Authentication requires two pieces of information to log in:
•Something you know: Your password.
•Something you have: A code sent to your phone, email, or an authentication app.
2. Choose the Type of 2FA You Prefer
There are different ways to receive your second verification:
•SMS Code: Sent to your phone number.
•Email Code: Sent to your email address.
•Authentication App: Such as Google Authenticator, Authy, or Microsoft Authenticator.
•Security Key: A physical USB or Bluetooth device for extra security.
3. Turn On 2FA in Your Account Settings
•Go to your account’s Settings or Security section.
•Look for Two-Factor Authentication or Two-Step Verification.
•Select your preferred method (SMS, email, app, or key).
4. Verify Your Chosen Method
•If using SMS, enter the code sent to your phone.
•If using an authentication app, scan the QR code provided on the screen.
•If using a security key, plug it into your device when prompted.
5. Save Backup Codes
Most services provide backup codes in case you lose access to your phone or email.
✅ Store them in a safe place (offline, not in your email inbox).
6. Test It Out
Log out of your account and log in again to make sure 2FA works. You should be prompted for your password and a verification code.
7. Use 2FA Everywhere You Can
Enable 2FA on your email, social media, banking, and shopping accounts. These are the most targeted by hackers.
Final Tip:
While 2FA is a strong security measure, never share your verification codes with anyone — even if they claim to be from the company.